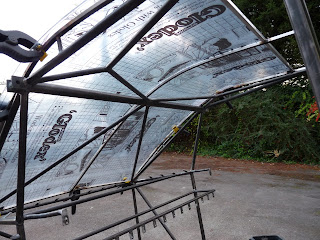
 I started work today by installing the piece of stainless steel channel that forms the top of the fuselage over the rear spar carry through. This has the front edge of the top fabric wrapped round it and a section of spruce inserted into the bottom to anchor the fabric. Then a section of aluminium sheet screws through the section and into the spruce to close the gap to the back of the windscreen. This sheet will also provide a suitable mounting for the GPS aerial. Next the windscreen itself was clamped into position using a piece of wood to keep the rear edge flat. The windscreen is a sheet of 4mm acrylic (perspex). The centre windscreen bow was then shaped to fit against the natural curve of the windscreen. This took quite a few iterations but eventually there was a good fit from front to back. The windscreen was then removed and a suitably sized stand-off fabricated for where the centre bow passes over the front spar carry through. Then the centre bow was welded into place; front, back and to the stand-off. I was unconvi9nced that the aluminium sheet would provide a neat rear edge to the windscreen which wants to bow and the sheet would probably not be strong enough to fully prevent this so I welded a second piece of stainless steel channel on edge to capture the rear of the windscreen, keep it in a straight line and anchor it against the three windscreen bows. This works very well as can be seen in the picture. Next I need to weld 30 or so tabs to the outside windscreen bows and across the top of the firewall. The windscreen will be match drilled to these and then cut to final shape. I've have made work for myself by using the channel at the back of the windscreen as to create a seal to the aluminium top panel I will need to weld a ledge to the back of it across the entire width to create a weather seal rather than just using tabs.

